Posted by dravon in LiveJournal, Project Review | 2 Comments
Making A MyTwin DressForm
When we set out on this project, it sounded rather easy. Turned out it requires quite a bit of endurance, makes a big mess, and was totally fun. I ordered 3 kits — 2 torso and one pants form. We made karmas_justice the torso form, and I combined the pants/torso into a combination for Miles. This is the documentation of the process.
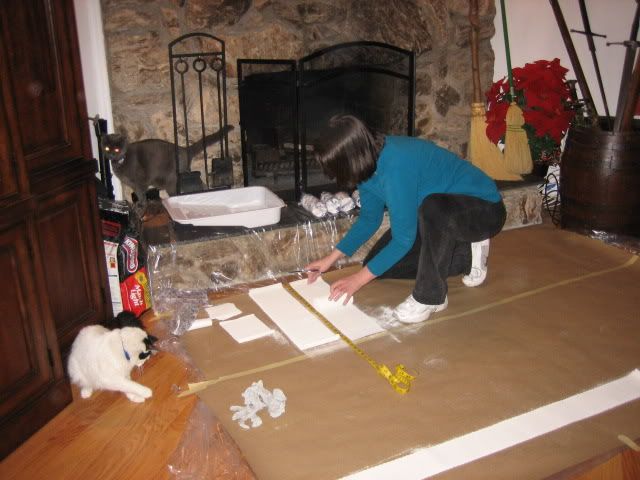
The how-to DVD that comes with the kits was quite helpful, so I set our stage to look sort of like that one. We got some of those thin plastic painter’s tarps, then laid down heavy paper on top of that to help absorb the water from the plaster-of-paris. This is the part that requires a lot more strength than I expected — a WHOLE lot of bending, stooping, kneeling, getting up, etc. The model reports things weren’t overly comfortable either.
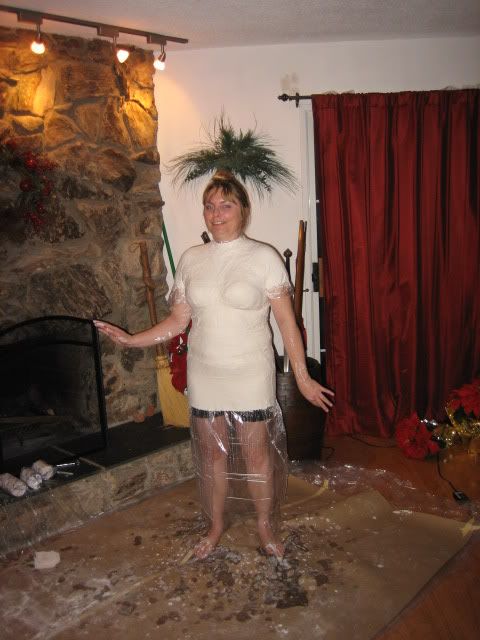
As you can see, this does indeed make a heck of a mess! Use warm water to start with — the water gets cold pretty fast anyway and you don’t need to shock your skantily-clad, plastic wrapped model by slapping a cold water drippy piece of wet plaster onto them right off the bat. hahaha Oh yes, and if you have cats, kick them out of the room. They want to be right in the middle of it and makes things even messier.
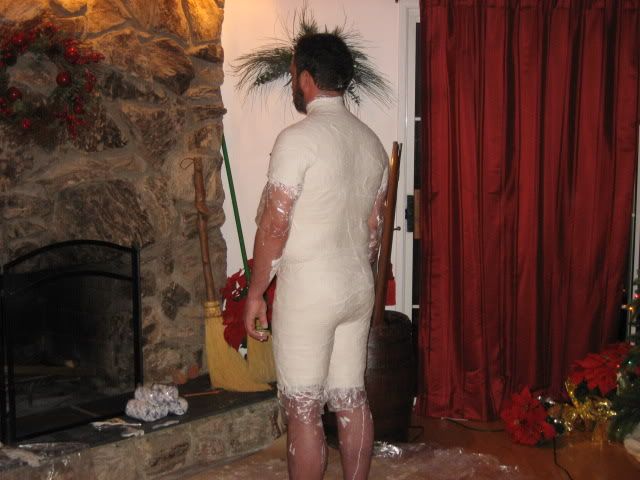
Miles in particular endured a lot and started to get rather cranky after a couple of HOURS of this. Yes. It took 2 hours to get him all plastered up and subsequently cut out. Ugh. Yes, not a speedy process and by now I’m moving a bit slowly myself. heh. Afterall, Justice took about an hour for hers as well, so I’ve been crawling around, bending, standing etc for 3 hours by the end of it. Not looking forward to that part, though it was fun slathering plaster all over someone. Just do be aware, this is not a job for the squeamish or shy — yes, you’ll have to mold the boobs, the butt and the privates of your model depending on what you’re doing. heh. Fortunately, Miles didn’t mind the later part since I was the one doing it. 😉
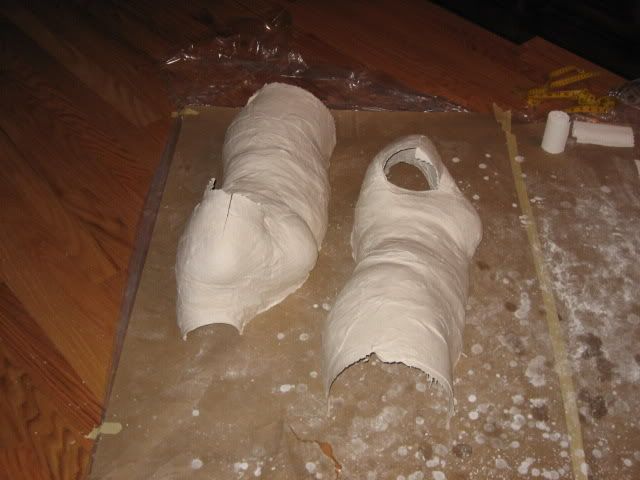
But we got the models successfully out of their plaster suits, though I recommend 2-3 layers of plaster bandage per area and no more than that. Cutting through more is rather hard on the hands, and I’m glad Justice has stronger hands than I do otherwise Miles would still be standing there in his armour. LOL Less plaster and the form starts to buckle, and (I learned later) will leak foam. It’s just a matter of experience to get the amount right and I think I have a better feel for it now.
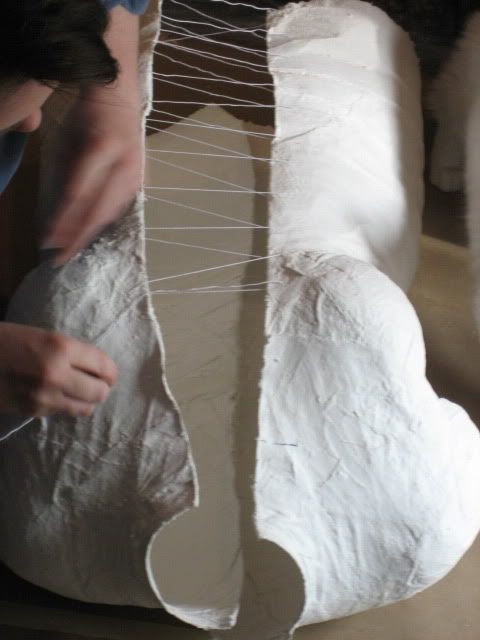
After letting the forms lay out over night to fully dry, they needed to be reassembled. I did what the DVD said by doing a long lace, but in hindsight I think a surgeon’s suture would be better. The problem with the long lace is that the edges overlapped, particularly on Miles’ form which was longer. This overlapping left a lovely (not) indent on the finished form. blargh. I think the shorter individually tied pieces will help prevent this and give the stitcher more precision with the work.
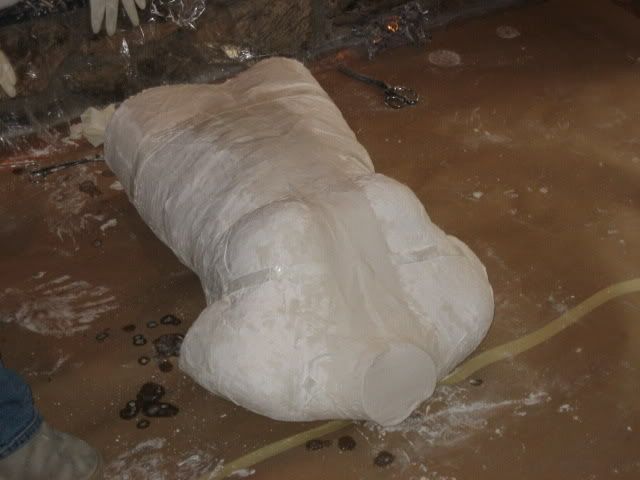
Once both sides of the forms were stitched back together into a single form, the cuts were sealed as were the arms and then neck for the torso and the legs for the combination. They were sealed with some plaster strips, as pictured. One thing I got wrong was that I put the strapping tape down before we put the plaster strips down, leaving this tape underneath the patch. Turns out, that was a darn handy mistake!! I’ll talk about it later, but this is a DEFINITE must-do on the next form. We left these patches to cure for several hours before moving on.
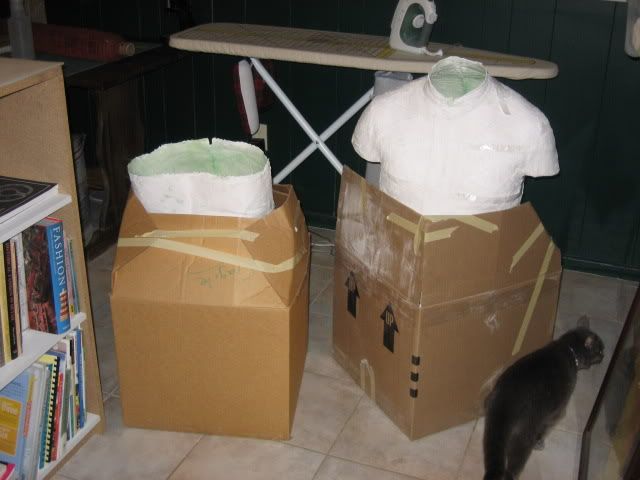
And here they are all ready to go! You can see the insides are a green color — that’s dyed surgical soap and let me tell you this is VITAL. I splashed around almost 2 bottles of the stuff inside that combination form, and it wasn’t easy because I had to reach through the neck to do it. yarg! When it came to stripping off the plaster, you knew exactly where I had missed with that soap. Be liberal. Very liberal, but because it’s liquid it will seep through the plaster so don’t be so liberal that there are standing pools of it anywhere. And now, it is time to pour.
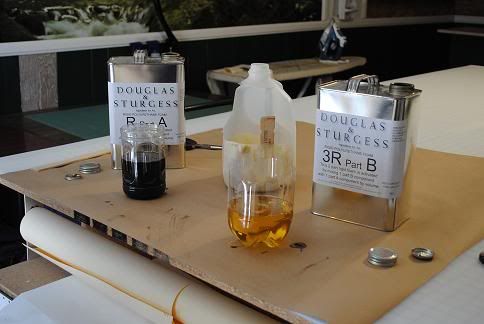
This part was fun! I wanted to try something with the combination form and it turned out to be a SMASHING success!! I got the rigid foam that is recommended (pictured) but I also inquired with the source about a softer, skin-like foam. They sent me that too. We mixed up the soft stuff (all the foams come in 2 parts, as pictured) and poured it into the combination form, turning the form around to spread the foam out while it was still liquid. The idea was that this would simulate the feel of skin on the outside. We ran out of the soft stuff because one entire quart set had to be thrown away due to problems (it shouldn’t rattle when you shake the bottle!) and the second quart wasn’t enough to cover the entire form as I’d wanted. The rest of the form was filled with the rigid foam. For the torso form, we went for the full rigid foam. I should have gotten about 1/2 gallon of the soft foam and 1-1/2 gallons of the rigid foam, but because the rigid foam was also a bad batch (I learned later after getting the second set) AND I had to throw out 1/2 of the soft foam, we didn’t have nearly enough to finish the job in a oner. Bummer!

It wasn’t particularly easy pouring the foam through the neck for the combination form, but it was fascinating to watch the 2-part liquid react and bloat up. Alas, I misjudging the foaming action at the end…
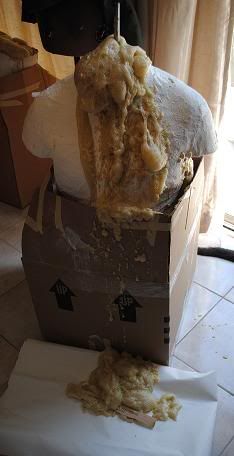
Oops. So have the floor prepared for accidents. And make sure to cover the work surface and also wear gloves too. That multi-part stuff is deceptive and gets everywhere. Wear clothes you don’t care about, just in case. But that “clothes” thing is REALLY for the steps in which you’re working directly with the plaster. That is horribly messy! At least the plaster does wash out of clothes … eventually.

After letting everything set for multiple days, it was time to remove the plaster. Don’t for an instant think you’ll end up with a nice nifty mold you can use again. Nuh-huh. That thing gets chipped apart to reveal the finished form underneath. Remember that “mistake” with the strapping tape I mentioned above? Turned out to be perfect. We’re looking at that thing thinking “how do we get started?” then spied the tape. Pulling it up, we ripped through the strip patch on the front and gave us immediate and easy access to the edges of the form. NIFTY!
You can see in the picture the different foams. That yellowish stuff is the soft foam, and the plaster came away from this like a dream! That darker yellow/mustard color is the rigid foam, and we had to chip the plaster away from this. ugh. We ended up having to soak the form in a wheelbarrow outside to soften up the plaster enough to peal away.
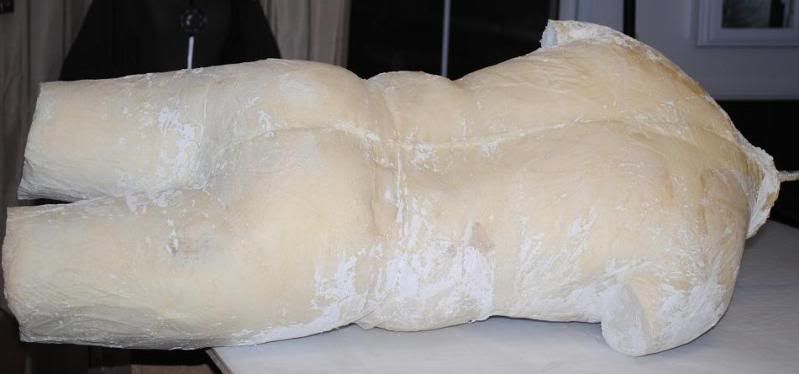
Fortunately, it all came off eventually and I found out that I didn’t need to get rid of ALL the plaster. As long as it’s thin enough (ie without the fabric strip part) then the pins can go through it with no problem! Yay! The one negative aspect of the soft foam is that you can’t shape it with a file or sandpaper when you’re done. That means if there’s this ridge down the back where the stitching made the mold overlap, there’s not a whole lot you can do about that. Oops.
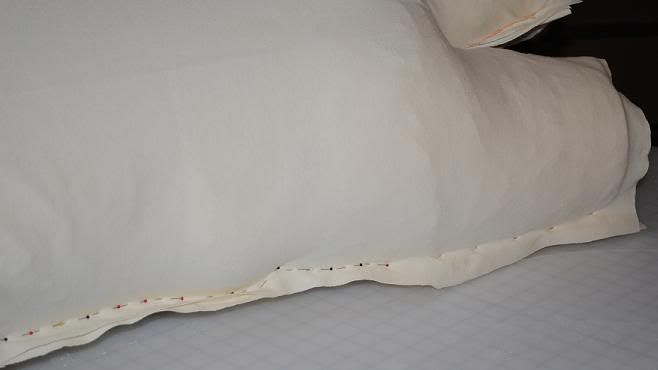
The combination form wasn’t the easiest thing to get the knit fabric sewn for. I laid down the fabric, pinned it together as shown, pulled it off and sewed up most of it. There was still a bit of hand stitching to do, and I had to leave enough ease in the fabric that eventually I could pin the arms into place. Also, for the pants aspect, the model really should stand with feet much wider apart. I hate to say it, but this one is not going to be overly useful for pants fitting at this point, but not quite useless. Oh yes and there is another layer of that lightweight plastic down between the form and the fabric. She states in the video that the rigid foam will break down over time and the plastic keeps the bits from bleeding through. I have no idea how the soft foam will hold up, but it’s a perfect skin-simulant feel.
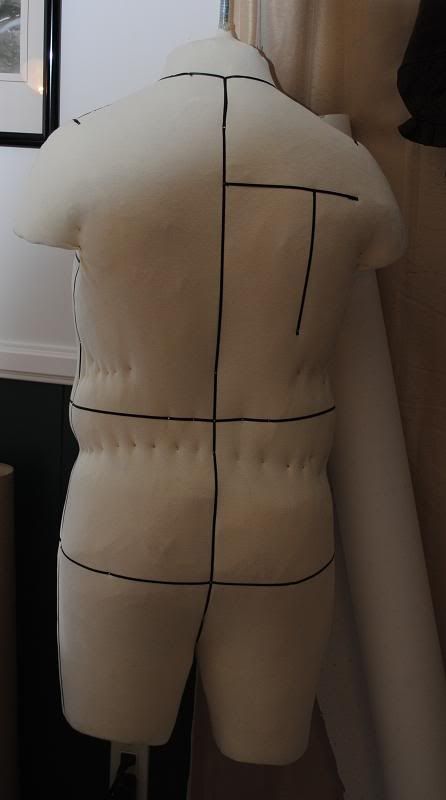
And here’s the finished form! The combination form hangs, while the torso form will go onto a stand. Alas, the stands are less than great. In fact, I tossed out the one that came with the pantsform kit. Not only was the little rod too small, the stand was too short. Hanging on the stand, the form’s shoulders were at my waist. Yuck. So I mounted the braces to the wall and have the combination form there. Once all the fabric bodysuit was done, I had to pin not only the fabric down so that it follows the contours of the body (too bad this can’t be glued down or something…) but I had to also add the reference and balance lines. I’ve added some lines that she didn’t mention in her tutorial but they were ones used extensively in our draping classes, so I’m glad I had that to fall back on.
For those balance lines, I tell you, you start to immediately see where the body is not all nicely perfectly symmetrical! It’s obvious Miles is a right-handed swordsman, I tell you. His right shoulder and neck are far more developed than the left, and that’s utterly invisible until you start putting lines on things. This translates to the sleeve placement too. Wow! That should really help the fit.
All in all, I’m thrilled with the end result and we’re already planning what to do better on the next one. Definitely need much more of that soft foam, and make darn sure there’s enough foam to do a full mold pour at the same time. I ran out half way through his, and on the belly there’s this large gap where the old and the new didn’t quite meet. Fortunately, once all assembled those things are harder to notice. There is also a whole lot of this which is experience based — the plaster mold creation part, for example, requires the molder to be familiar with what they are doing and why. Now that I saw the problems with too much or too little plaster during the pour and cutting phases, I’ll know better for the next time. Also, experience with the mixing of that foam really goes a long way in terms of getting the most out of it. The reason I miscalculated with the combination form and put too much in was because I finally figured out how to mix it properly before pouring it in. When properly mixed, it apparently foams a LOT, far more than I had seen on the previous 3 batches. *lol*

And so here is the dressform in use. I couldn’t wait to see if something made for Miles would fit on it, so I put the work-in-progress doublet onto it and it fit so nicely! This is the form without the balance lines on it, but you get the idea. It’ll work muy nicely! YAY!


Wow, great info on this whole process. I’m keeping it in memories for that future time when I get the nerve up to tackle one myself. Thanks so much, and enjoy sewing with your new dress form.
Wow, very cool! I will have to keep this in mind as a potential future project.